Overview
The “Insert data” mode allows you to quickly insert data from documents into your Excel spreadsheet. For more information on what documents are available on finbar, see Documents in the web app documentation.Basics
After selecting an organization, click “Insert data”. Select a period and document type to show tables available for that organization.If no tables are available, it may be because the document has not yet been processed by finbar. Please contact your finbar representative to request priority onboarding.
Navigating data
Use the arrows to navigate between tables. You can click “Open original online” to view the original source of the table on the web app. Use “Filter for tables containing specific keywords” to only show tables that contain specific keywords in the table row names. Use “Find the most similar table to the current spreadsheet selection” to use your pre-existing spreadsheet data to jump to the most similar table available for the selected document. First, select some text inside your spreadsheet to use as the basis for the search. This text should be similar to the row names of the table you are looking for. Then click the button to find the most similar table.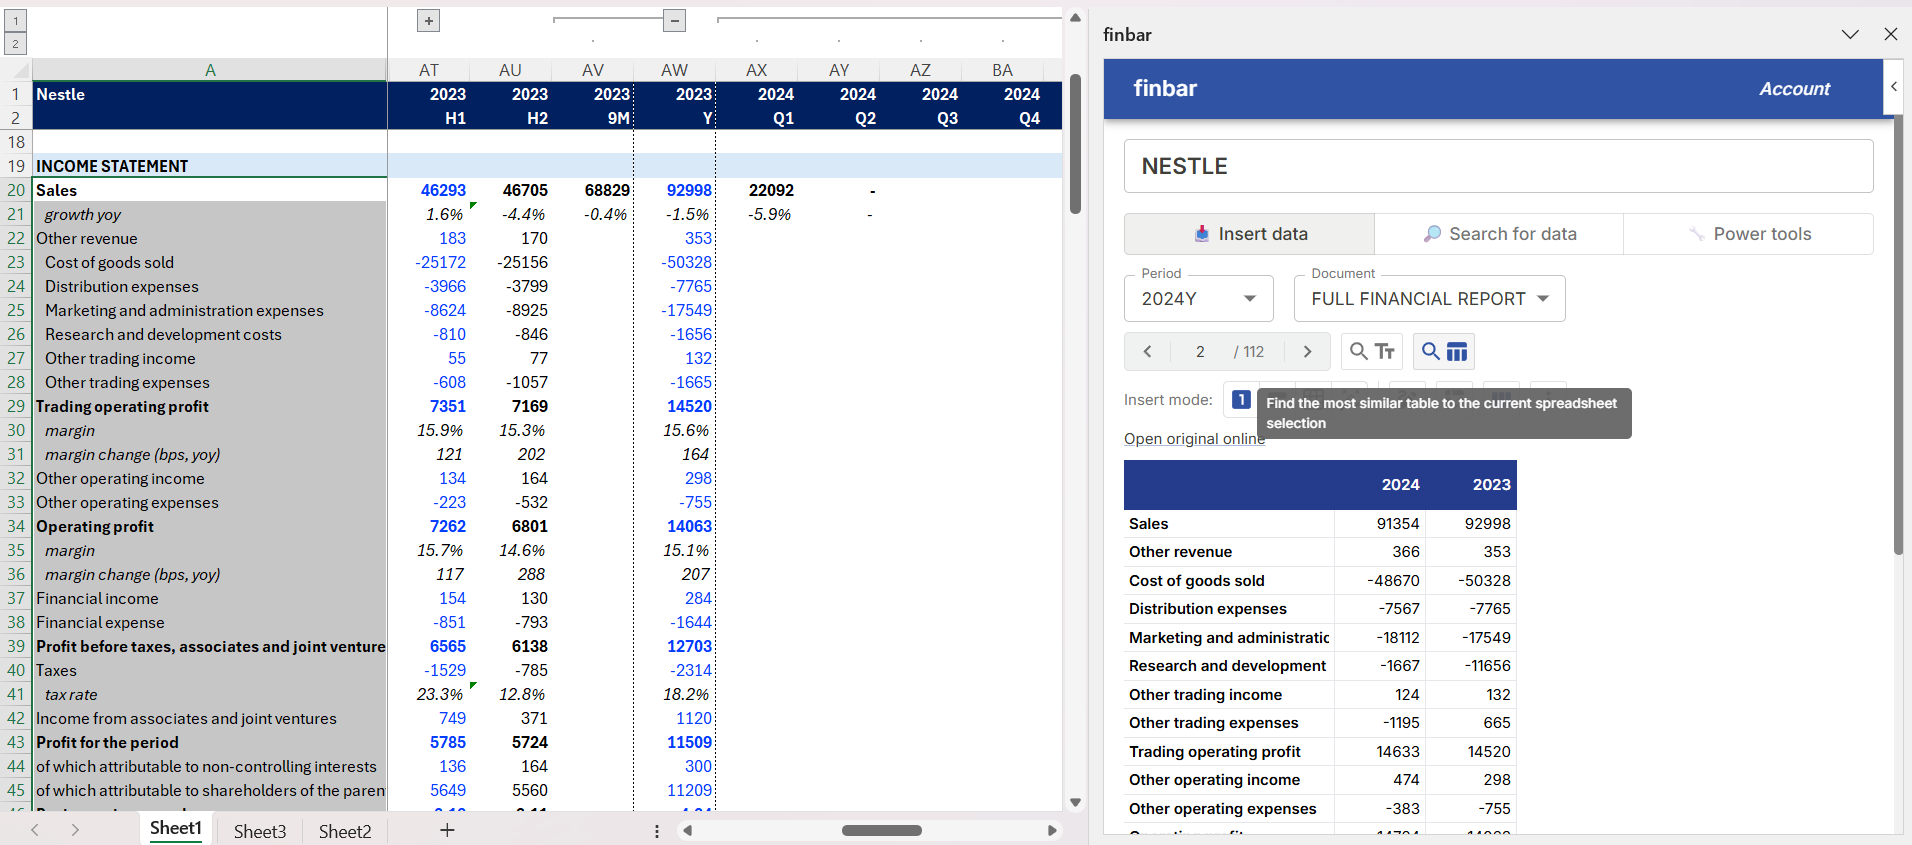
Inserting data
Click inside the table to insert data from the table into your spreadsheet. The ‘Insert mode’ options determine what data is inserted. You can choose between inserting individual datapoints, whole rows/columns, or the entire table.Insertion behaviour changes depending on whether you are clicking inside the body of the table or in the header row/column. Hover to see what will be inserted.Generally, clicking inside the body will ignore blank cells, while clicking in the header will include blank cells.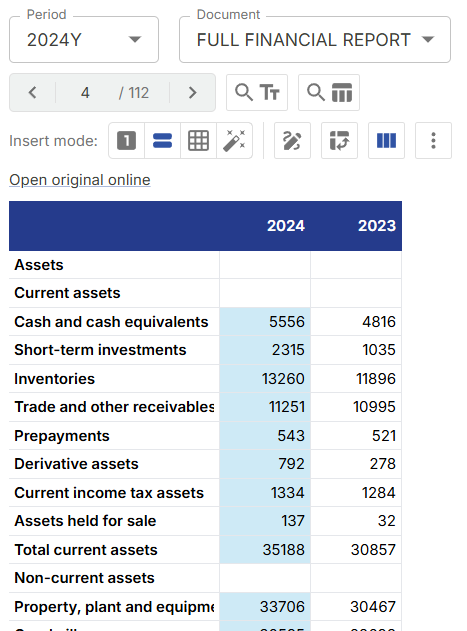
Insert options
There are different options to configure insertion behaviour. By default, the add-in will not perform any actions that will overwrite existing data in your model. This can be changed by selecting the “Overwrite” option.Due to limitations in Excel, any actions performed by the add-in into your Excel file cannot be undone via Excel’s undo functionality. It is recommended you make frequent saves of your file to prevent data loss.
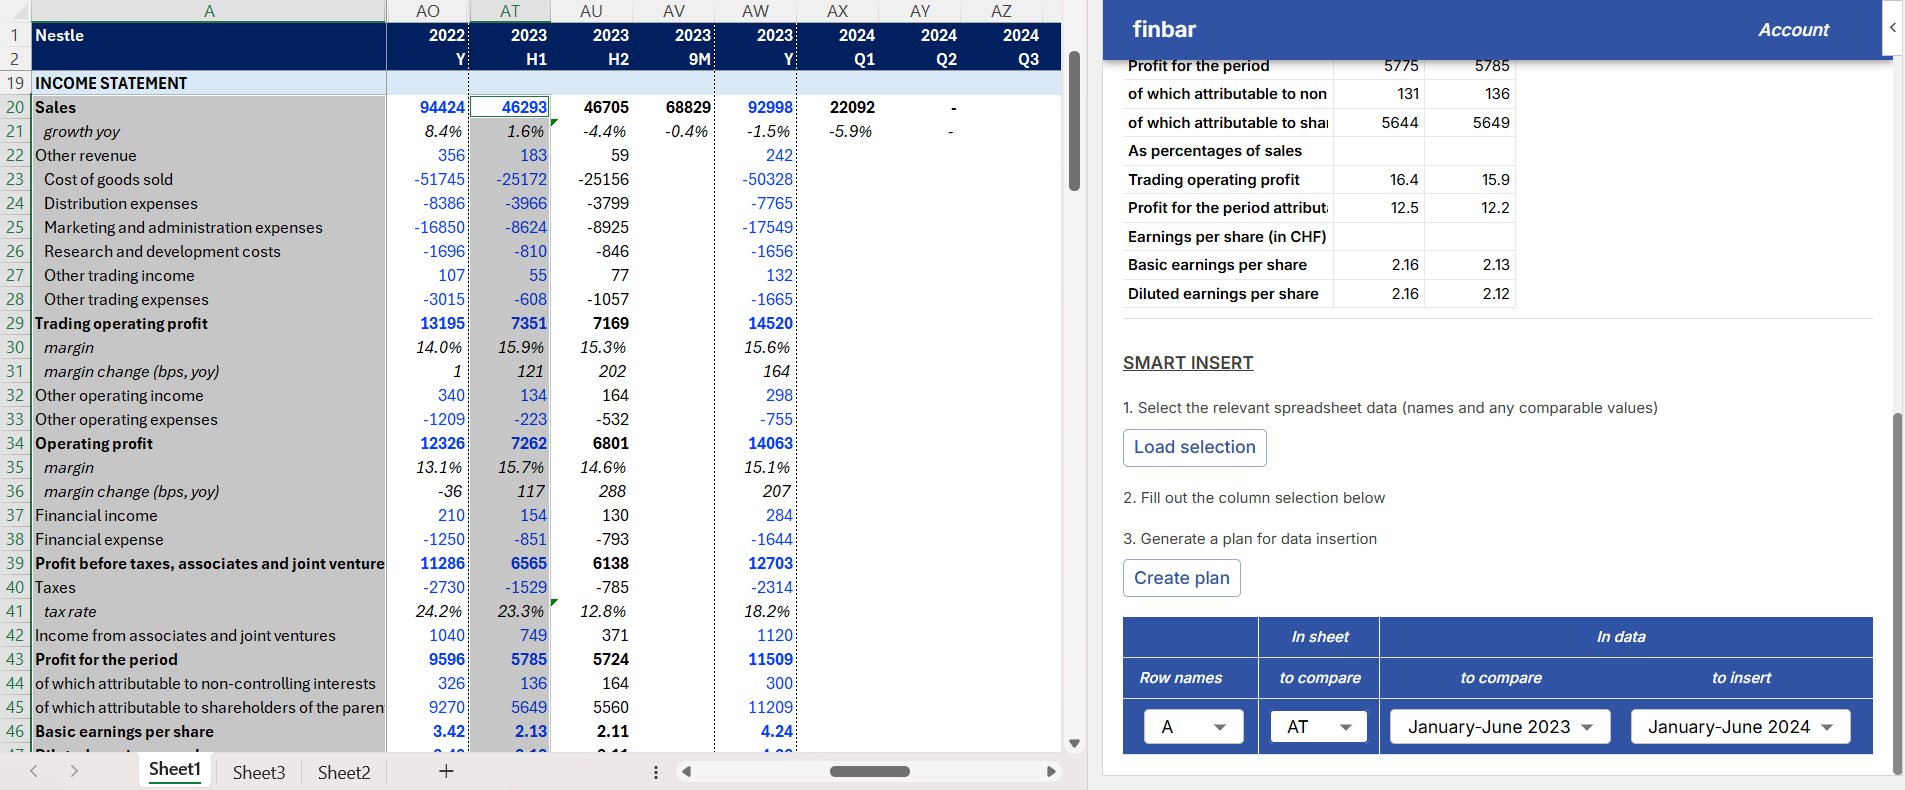
Smart Insert
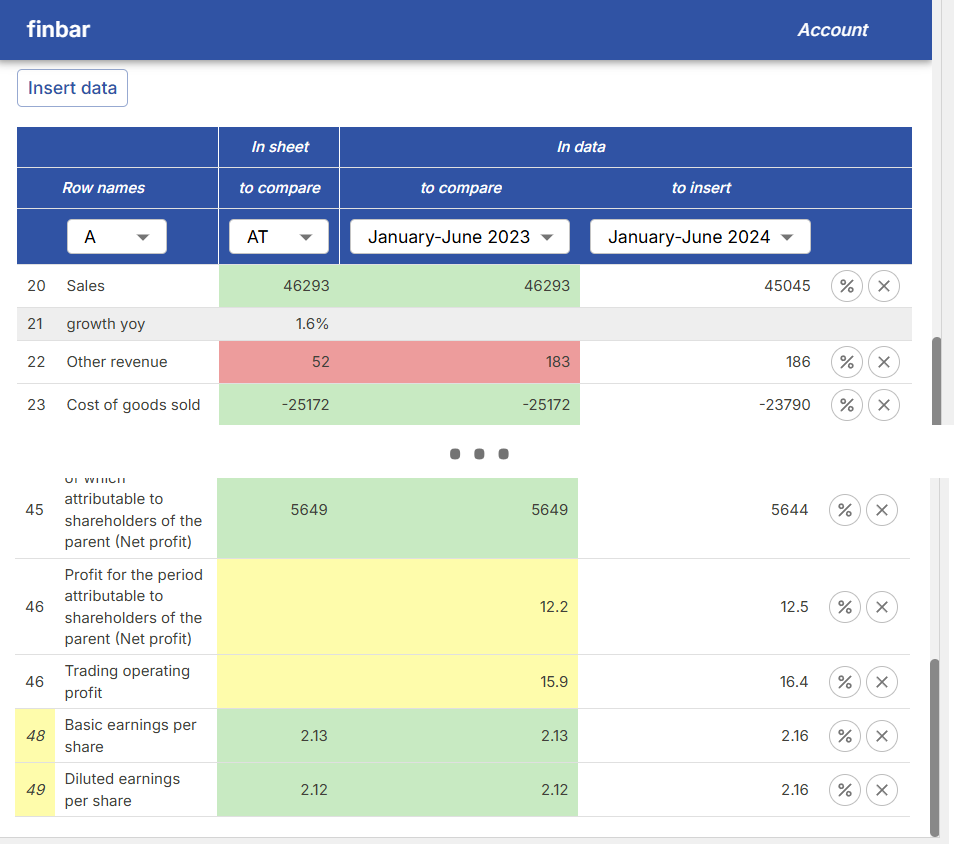
Click “Smart Insert” to adaptively insert data from the table into your spreadsheet. This tool attempts to manipulate the table data to best match what’s already in your model. Follow the instructions at the bottom of the taskpane to generate a plan for inserting data. For best results, use tables where prior data is given that can be used for comparison. For example, you may have an income statement for 1H24 that you want to insert into your model. The table also contains 1H23 data. Following the instructions, you should select the cells in your model containing 1) the row names for the income statement, and 2) the cells in your model containing the 1H23 income statement data. Then fill in the column selection to match. ‘Row names’ should be the column in your spreadsheet containing the row names for the income statement, and ‘In sheet to compare’ should be the column in your spreadsheet containing the 1H23 income statement data. Finally, select which column in the table is for comparing to the supplied data (1H23, in this case), and which column in the table is for insertion. Click “Create plan” to generate a plan for inserting data into your model.